
Winter is on its way and the chill is going to start setting in soon. Already it’s getting darker earlier and you’ve probably found yourself breaking out the jumpers at least once.
So you know what that means, right? It’s time to get the creative juices flowing and make yourself a good supply of delicious homemade cider.
There’s nothing that’s quite as comforting or warming in the depths of winter as a good cider. What a lot of people don’t know is that it’s actually very easy to make your own, at home, using the ingredients that you’ll find in your Good & Fugly box.
Don’t believe us? Here’s the seven simple steps that will get you there:
Step 1: Assess Your Ingredients
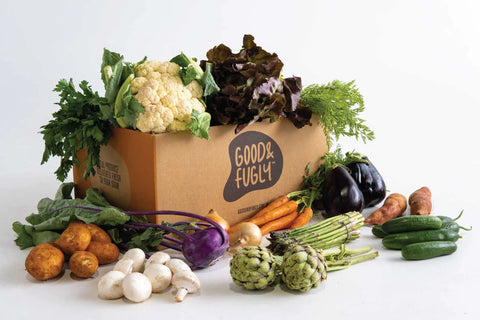
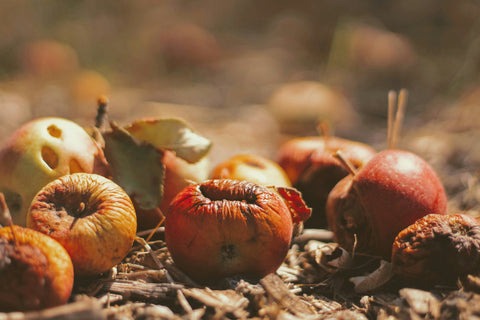
Begin by sorting through your Good & Fugly box. Identify the fruits that are traditionally used in ciders, such as apples and pears, which are known for their fermentable sugars and flavours that complement the fermentation process. Importantly, don’t overlook the produce that’s starting to look a little worse for wear. Ciders are an excellent way to fight food waste by finding a way to use still-edible foods that are not as pleasant to eat as-is.
In addition to the common fruits, consider the less conventional ones that may be lurking in your box, too. And don’t ignore the vegetables, either! The veggies with higher sugar content, like carrots, can actually make for an exceptional cider base too.
Step 2: Prepare Your Produce
It’s critical that your produce is clean before you begin the cider process. Thoroughly wash all the fruits and vegetables. For fruits, chop them into small chunks, discarding any seeds, stems, or cores. This increases the surface area for the yeast to work on and ensures a more uniform fermentation. Soft fruits like berries can be mashed to release their juices. For vegetables, peel if necessary and cut into smaller pieces to extract maximum flavour.
Once your produce is prepared, you have a decision to make: to juice or not to juice. Juicing will give you a clearer cider, while blending can result in a more rustic, full-bodied drink. If you choose to blend, add just enough water to help the process along and strain the pulp out afterwards. This step is crucial as it sets the stage for the type of cider you’ll end up with—clear or cloudy, smooth or textured.
Step 3: Juice or Blend
If you’re juicing, use a fruit press or juicer to extract the liquid from your fruits and vegetables. This method is ideal for harder fruits like apples and pears. The goal is to collect as much juice as possible, which will be the base of your cider. For softer fruits or if you don’t have a juicer, blending is a great alternative. Blend the produce with a bit of water to create a puree, then strain it to separate the juice.
After juicing or blending, you should have a vibrant, flavourful liquid that’s ready for fermentation. If you’ve blended, make sure to strain the mixture through a cheesecloth or fine mesh to remove any solid particles. This will ensure a smoother cider and prevent off-flavours from developing during fermentation. Remember, the quality of your juice will greatly influence the final taste of your cider, so take your time with this step.
Step 4: Fermentation
Now the magic starts! Pour the juice into a sanitised fermentation vessel, leaving some headspace at the top. Add a cider yeast, which is specifically cultivated to bring out the best in apple-based beverages. The yeast will consume the sugars in the juice, producing alcohol and carbon dioxide.
Keep the fermentation vessel in a cool, dark place, ideally between 15-24°C. Attach an airlock to the vessel to allow gases to escape without letting air in, which could introduce unwanted bacteria. The length of the fermentation process can vary, typically taking a few weeks to a couple of months. You’ll know fermentation is complete when bubbling in the airlock ceases and the cider clears.
This is the most expensive part when you start creating ciders for the first time, but it’s all reusuable, so after that initial investment you won’t have to do much more than clean it all before you can make your next batch of cider.
Step 5: Monitor the Fermentation
Monitoring the fermentation process is crucial. Check the airlock regularly to ensure it’s functioning correctly. If you notice any off-odours or mould, it may indicate contamination. When in doubt, it’s better to dispose of the liquid and try again – you don’t want a trip to the hospital putting you off making ciders again. Keep a close eye on the temperature as well; fluctuations can affect the yeast’s activity and the cider’s flavour profile.
As the cider ferments, the sugars are converted into alcohol, and the flavour profile develops. You can take hydrometer readings to track the specific gravity, which will give you an idea of the alcohol content and how the fermentation is progressing. Once the specific gravity remains constant for a few days, fermentation is likely complete.
Step 6: Bottling
Sanitise your bottles and any siphoning equipment you’ll use. Carefully siphon the cider from the fermentation vessel into the bottles, avoiding disturbing the sediment at the bottom. If you prefer a sweeter cider, you can add a small amount of sugar to each bottle before filling. This will also carbonate the cider as the yeast ferments the added sugar, creating CO2.
Seal the bottles tightly with caps or corks and store them in a cool, dark place to mature. The cider will continue to develop its flavours over time. After a few weeks, your cider will be ready to enjoy, but it can also be aged for several months to enhance its complexity.
Step 7: Enjoy!
Once your cider has matured, it’s time to enjoy the fruits of your labour. Chill the cider before serving to enhance its refreshing qualities. Homemade cider is not only a tasty beverage but also a conversation starter and an excellent option for unique, hand-crafted gifts.
So share your cider with friends and family, and don’t forget to save a few bottles for yourself! Each batch of cider will be unique, reflecting the specific blend of fruits and vegetables you used, as well as your personal touch throughout the process.